I’ll begin this blog post with a disclaimer: This is still very experimental, and it may not be right for every scenario.
Great, now that I have that out of the way, let’s talk about the problem we were facing.
The Problem
UIViewControllers are harder to test than most classes and structs. They are so tightly coupled to their views, and in turn the view lifecycle, that testing them becomes very difficult as you cannot mock/stub out the view. Many developers just don’t test UIViewControllers because of it…us (currently) included.
For example:
The view is lazy-loaded, so you have to be sure to call on it so that all of its outlets load.
func testSomeButtonOutlet() {
    let vc = ViewController()
    let _ = vc.view // force the view to load, this would probably be in setup

    XCTAssertNotNil(vc.someButton)
}
Maybe I want to test deinit. In order to get deinit to fire at a time I can control, I have to surround it in an autoreleasepool.
func testDeinit() {
    autoreleasepool {
        vc = UIStoryboard(name: "Main", bundle: nil)
                .instantiateViewControllerWithIdentifier("ViewController")
                as! ViewController
    }

    // Now deinit has fired
}
I’m not trying to say you shouldn’t test UIViewControllers, and certainly not that you can’t. I want to be able to test the logic that is in my UIViewController, but doing so forces us to re-create the lifecycle of the ViewControllers, which can be a lot of work and a bit hacky, so we’d rather avoid it.
A Solution: MVVM
MVVM stands for Model-View-ViewModel. Before I talk about what MVVM is, let’s talk about what MVVM isn’t.
- The version of MVVM I use doesn’t end at the ViewModel. There’s no networking, database code, or even business logic in my ViewModels, in the same way that MVC in most applications hopefully has objects to do this kind of work that the ViewController communicates with.
- MVVM is not ReactiveCocoa, RxSwift, KVO, etc. It doesn’t stand for “Model-View-??magic??-ViewModel”. That’s not to say you can’t use these; By all means you can, but MVVM as i know it does not require these frameworks.
There were several reasons why we chose not to use these frameworks:
- They’re relatively new to iOS, and for a long term project we couldn’t be sure any specific one would stick around and be supported.
- This piggy-backs off of 1., but they aren’t something you can write wrappers for, and easily replace with something else if it does stop being supported.
- We’re all-in on Swift, and as Swift evolves so do these frameworks.
- There’s a substantial learning curve associated with them, so using these frameworks in a project would be a big committment for our team.
With that out of the way, What is MVVM?
Model
The Model is a representation of the actual data we’ll be dealing with. Your Model has no knowledge of the application it is being used in, and contains no logic.
View
The View is what the end user interacts with. The View does not contain any logic; It is told what to display and carries out that task, along with forwarding any events (such as taps) to the ViewController.
ViewModel
The ViewModel keeps track of events that are given to it from the ViewController, as well as data from the Models. They are going to expose properties and methods that will help to maintain the state of the View. They have no knowledge of where any events received from the ViewController originate from, or how specifically it is being displayed to the user.
View Controller (on iOS)
MVVM does not have to have a ViewController, but there’s really no choice on iOS. I know, it should be MVCVM, but let’s not split hairs about acronyms. The ViewController listens to events from the View, and informs the ViewModel of them. They’re also the only objects that understand what data is seen and where.
Example of this setup
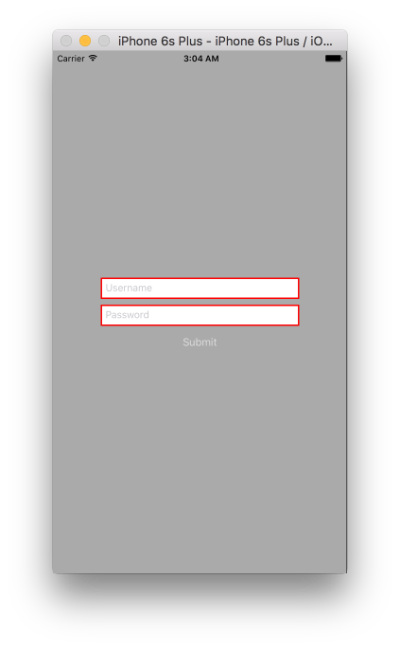
For this example, let’s make a registration form.
When the username or password is invalid, the border of the textField will turn red. When both the username and password are valid, the submit button will be enabled.
Let’s explore how these are implemented.
Misc
This is the class we’re going to use to validate the username and password:
import UIKit

enum RegistrationInputValidatorError: ErrorType {
    case EmptyUsername
    case EmptyPassword
}

class RegistrationInputValidator {

    // MARK: - Interface

    func validateUsername(username: String?) throws {
        guard let username = username where !username.isEmpty else {
            throw RegistrationInputValidatorError.EmptyUsername
        }
    }

    func validatePassword(password: String?) throws {
        guard let password = password where !password.isEmpty else {
            throw RegistrationInputValidatorError.EmptyPassword
        }
    }
}
Model
There’s no real model in this example. If it actually stored registration information that may be one.
View
I designed this view myself, look at it and all of its glory!
ViewModel
Let’s take a look at the interfact for our ViewModel:
import UIKit

protocol RegistrationViewControllerViewModel {

    weak var delegate: RegistrationViewControllerViewModelDelegate? { get set }

    var usernamePlaceholderText: String? { get }
    var usernameBorderColor: UIColor? { get }
    var usernameBorderWidth: CGFloat { get }
    var passwordPlaceholderText: String? { get }
    var passwordBorderColor: UIColor? { get }
    var passwordBorderWidth: CGFloat { get }
    var submitTextColor: UIColor { get }
    var submitEnabled: Bool { get }

    func submitButtonPressed()
    func usernameTextDidChangeToText(text: String?)
    func passwordTextDidChangeToText(text: String?)
}

protocol RegistrationViewControllerViewModelDelegate: class {
    func reloadViews()
    func moveToHomeScreen()
}
You can see that all of the properties exposed are read-only. to keep a one-way data flow, this is necessary. The ViewController can only call methods on the ViewModel, and the ViewModel can only ask the ViewController to update its state.
There are a few rules for the ViewModel:
- The ViewModel cannot call methods directly on the ViewController. (Hence why the ViewController, the delegate, is hidden behind a protocol)
- The ViewModel must tell its delegate to reload its views when it modifies the state of an exposed property.
- The ViewModel must only call methods on its delegate on the main thread (for safety)
- The properties of the ViewModel must be of the same type as what they will be used for. For instance, if a view’s
backgroundColorcan be nil, the exposed property forbackgroundColormust be an optional.
Let’s take a look at the implementation of this ViewModel:
import UIKit

class RegistrationViewControllerDefaultViewModel: RegistrationViewControllerViewModel {

    // MARK: - Properties
    // MARK: -- Internal

    weak var delegate: RegistrationViewControllerViewModelDelegate?

    let usernamePlaceholderText: String? = "Username"
    var usernameBorderColor: UIColor? {
        return usernameValid ? .blackColor() : .redColor()
    }

    let usernameBorderWidth: CGFloat = 2.0
    let passwordPlaceholderText: String? = "Password"
    var passwordBorderColor: UIColor? {
        return passwordValid ? .blackColor() : .redColor()
    }

    let passwordBorderWidth: CGFloat = 2.0
    var submitTextColor: UIColor {
        return submitEnabled ? .blackColor() : .lightGrayColor()
    }

    var submitEnabled: Bool {
        return usernameValid && passwordValid
    }

    // MARK: -- Private

    private let registrationInputValidator: RegistrationInputValidator
    private var usernameText: String = ""
    private var passwordText: String = ""
    private var usernameValid: Bool = false
    private var passwordValid: Bool = false

    init(registrationInputValidator: RegistrationInputValidator) {
        self.registrationInputValidator = registrationInputValidator
    }

    // MARK: - Actions

    func submitButtonPressed() {
        do {
            try registrationInputValidator.validateUsername(usernameText)
            try registrationInputValidator.validatePassword(passwordText)

            tellDelegateToMoveToHomeScreen()
        } catch {
            print("Danger Will Robinson! Danger!")
        }
    }

    func usernameTextDidChangeToText(text: String?) {
        usernameText = text ?? ""

        do {
            try registrationInputValidator.validateUsername(usernameText)
            usernameValid = true
        } catch {
            usernameValid = false
        }

        tellDelegateToReloadViews()
    }

    func passwordTextDidChangeToText(text: String?) {
        passwordText = text ?? ""

        do {
            try registrationInputValidator.validatePassword(passwordText)
            passwordValid = true
        } catch {
            passwordValid = false
        }

        tellDelegateToReloadViews()
    }

    // MARK: - Delegate Response

    private func tellDelegateToMoveToHomeScreen() {
        delegate?.moveToHomeScreen()
    }

    private func tellDelegateToReloadViews() {
        delegate?.reloadViews()
    }
}
You can see from this that the flow of events goes from the ViewController, calling methods on the ViewModel, which updates the state of its exposed properties, and tells the delegate (ViewController) to reload its views, as the state may have changed.
ViewController
The ViewController has a few general rules to follow also:
- The ViewController cannot call methods directly on the ViewModel (Hence why it is hidden behind a protocol)
reloadViewscan be called at any time and any number of times. The ViewController has to be able to account for this.
Let’s take a look at what the ViewController has become:
import UIKit

class RegistrationViewController: UIViewController,
    UITextFieldDelegate,
    RegistrationViewControllerViewModelDelegate
{

    // MARK: - Properties
    // MARK: -- Internal

    var viewModel: RegistrationViewControllerViewModel? {
        didSet {
            viewModel?.delegate = self
        }
    }

    // MARK: -- Outlets

    @IBOutlet private weak var usernameTextField: UITextField!
    @IBOutlet private weak var passwordTextField: UITextField!
    @IBOutlet private weak var submitButton: UIButton!

    // MARK: - Lifecycle Methods

    override func viewDidLoad() {
        super.viewDidLoad()

        configureAllViews()
    }

    // MARK: - Configuration Methods

    private func configureAllViews() {
        configureUsernameTextField()
        configurePasswordTextField()
        configureSubmitButton()
    }

    private func configureUsernameTextField() {
        guard let viewModel = viewModel else {
            return
        }

        usernameTextField.delegate = self

        usernameTextField.placeholder = viewModel.usernamePlaceholderText
        usernameTextField.layer.borderColor = viewModel.usernameBorderColor?.CGColor
        usernameTextField.layer.borderWidth = viewModel.usernameBorderWidth
    }

    private func configurePasswordTextField() {
        guard let viewModel = viewModel else {
            return
        }

        passwordTextField.delegate = self

        passwordTextField.placeholder = viewModel.passwordPlaceholderText
        passwordTextField.layer.borderColor = viewModel.passwordBorderColor?.CGColor
        passwordTextField.layer.borderWidth = viewModel.passwordBorderWidth
    }

    private func configureSubmitButton() {
        guard let viewModel = viewModel else {
            return
        }

        submitButton.setTitleColor(viewModel.submitTextColor, forState: .Normal)
        submitButton.enabled = viewModel.submitEnabled
    }

    // MARK - Actions

    @IBAction private func submitButtonPressed(sender: UIButton) {
        viewModel?.submitButtonPressed()
    }

    func textField(textField: UITextField,
        shouldChangeCharactersInRange range: NSRange,
        replacementString string: String)
        -> Bool
    {
        let text = (textField.text as NSString?)?.stringByReplacingCharactersInRange(range, withString: string)

        if textField == usernameTextField {
            viewModel?.usernameTextDidChangeToText(text)
        } else if textField == passwordTextField {
            viewModel?.passwordTextDidChangeToText(text)
        }

        return true
    }

    // MARK: - RegistrationViewControllerViewModelelegate Methods

    func reloadViews() {
        configureAllViews()
    }

    func moveToHomeScreen() {
        let alertController = UIAlertController(title: "Success!",
            message: "Successful Registration!",
            preferredStyle: .Alert)

        let OKAction = UIAlertAction(title: "OK", style: .Default, handler: nil)
        alertController.addAction(OKAction)

        presentViewController(alertController, animated: true, completion: nil)
    }
}
You can see that the ViewController doesn’t really have any logic in it. It tells the ViewModel when actions occur, such as text changing, or the submit button being pressed. Sometimes it gets told to reload views or move to another screen (which has just been replaced with an alert)…for all it knows rather randomly.
So I claimed it’d be easy to test, let’s see an example of what that would look like.
func testInvalidUsernameInvalidPassword() {
viewModel.usernameTextDidChangeToText(nil)
viewModel.passwordTextDidChangeToText(nil)
XCTAssertEqual(viewModel.usernameBorderColor, UIColor.redColor())
XCTAssertEqual(viewModel.passwordBorderColor, UIColor.redColor())
XCTAssertFalse(viewModel.submitEnabled)
}
func testValidUsernameInvalidPassword() {
viewModel.usernameTextDidChangeToText("fan")
viewModel.passwordTextDidChangeToText(nil)
XCTAssertEqual(viewModel.usernameBorderColor, UIColor.blackColor())
XCTAssertEqual(viewModel.passwordBorderColor, UIColor.redColor())
XCTAssertFalse(viewModel.submitEnabled)
}
func testInvalidUsernameValidPassword() {
viewModel.usernameTextDidChangeToText(nil)
viewModel.passwordTextDidChangeToText("9:41")
XCTAssertEqual(viewModel.usernameBorderColor, UIColor.redColor())
XCTAssertEqual(viewModel.passwordBorderColor, UIColor.blackColor())
XCTAssertFalse(viewModel.submitEnabled)
}
func testValidUsernameValidPassword() {
viewModel.usernameTextDidChangeToText("fan")
viewModel.passwordTextDidChangeToText("9:41")
XCTAssertEqual(viewModel.usernameBorderColor, UIColor.blackColor())
XCTAssertEqual(viewModel.passwordBorderColor,UIColor.blackColor())
XCTAssertTrue(viewModel.submitEnabled)
}Pros/Cons
Pros
- The view-related logic is really easy to test in the ViewModel. Mocks can be cleanly written and used for the
RegistrationInputValidator, and theRegistrationViewControllerViewModelDelegate. - Because we can make custom initializers on the ViewModel, we can guarantee its dependencies exist at runtime. (and keep in mind this is a very simple example, other ViewModels may have many more dependencies)
- Because of the one way data flow, all of the work validating could potentially be done on another thread, and then thrown back to the main thread before calling
reloadViewsormoveToHomeScreen. The setup naturally works asynchronously. - We didn’t have to use any 3rd party libraries to accomplish any of this.
- If we were to want to test our ViewControllers, they are now slimmed down and have much less to test.
Cons
- You can see that
reloadViewssets everything again. This isn’t the best performance decision in the world. It has worked so far for our uses, but it may not be right for other situations. Frameworks like RxSwift manage this with their bindings, only updating what is necessary. A more complicated system could be implemented, but keeping it simple is one of the goals. - It is but another class to add to your growing project in the name of modularity.
Conclusion
This MVVM setup is still a work in progress, but it has filled a role fairly well so far for us. I can’t determine if it will be the future of our iOS architecture. I’m sure there are many situations that have not been considered yet, but it’s an interesting step and experiment.
If you made it all of the way here, well done. When I began writing this, I didn’t expect it to be this long. We should have some more interesting blog posts coming, so keep an eye out for them. Feel free to get in touch if there’s anything you’d like to add or comment about. Happy Dev-ing!